Thursday 22 November 2012

IPHONE (IOS) - GAME - LINE POP - an abnormal use of device has been detected. the service is no longer available on the device (Solved)


Dear Line Pop gamer, 

For those who hit this error message :"an abnormal use of device has been detected. the service is no longer available on the device"   you may follow the step below to solve your issues. 

Note: This solution is only applied on those jailbreaked Iphone (included mine ***devil laugh: muahahahah***)~~~~

Symptoms

1) When you launched LINE POP, you hit the error below : 


Solution :

1) Remove/Uninstall your linepop : 


2) open your Cydia application : 


3) Go to manage - > Edit -> Add


4) enter this URL: http://cydia.hiraku.tw/   -> then click Add Sources

5) then you will see it running some updates , then click on "Return to Cydia"

6) Then click on Search , enter "Line no detect", then you will found the plug-in listed :


7) Now, click on Install -> Confirm 

8) Another black screen coming out for installing , once done click on reboot device. 


9) OK, now you may go to App Store again search for Line-Pop, and install this game again. 


10) Launch Line POP, as usual just like newly setup game, you need to agree with the term & conditions bla bla bla~ (No worry, you previous record and friend list will still retain), then relaunch again the game : 


HURRAY!!!!!!!!!!!!!!!!!!!!!!!!!!!! it's running now!!!

Now you may enjoy your game~   cheers ~


And yet, thanks to 志雄911 @ Mobile01 forum, this solution is share by him.


Regards,
Undead -Jack 


Sunday 6 May 2012

Things to DO after installing Ubuntu 12.04

Things to DO after installing Ubuntu 12.04

After successfully installed the Ubuntu to your machine, there are some commands that you have to run to install the updates and plug-in in order to get your system running more smoothly.

Open a terminal windows by following step or use shortcut key (Ctrl + Alt + T) :

fig 0.1

fig 0.2


1. Check and install for Updates
- Run the command below to install the latest updates :

sudo apt-get update && sudo apt-get upgrade

- Step 1 Completed


2. Install Ubuntu Restricted Extras
- Ubuntu by default cannot recognize the media format
- This plug-in/package is to make your system recognize and play popular file formats like mp3, avi, Flash videos etc....
- run the Command below :


sudo apt-get install ubuntu-restricted-extras

- Step 2 Completed.


3. Check and Update the Hardware Driver- Normally while you install the Ubuntu system, it will auto detect and install all the hardware drive such graphic card, network card, sound card and etc... somehow, there are still some certain cases the driver was not correctly installed to your system

- To ensure that all your driver is updated, you may follow the step below to find out :

fig 3.1

- Find the "System Settings" on your left hand side, then click "Additional Drivers" ,if the driver not installed correctly, it will list down from there.
- What you need to do is, find the driver and click "install" will do.
- Step 3 Completed


4. Enable Dual Layer DVD/Encrypted Support- Even you have installed the retricted extras but still, there are not support or failed to play the dual layer DVD ( I also dunno why ......, dun ask me)

- You need to run the commands below to install the medibuntu and enable the function :

sudo wget --output-document=/etc/apt/sources.list.d/medibuntu.list http://www.medibuntu.org/sources.list.d/$(lsb_release -cs).list && sudo apt-get --quiet update && sudo apt-get --yes --quiet --allow-unauthenticated install medibuntu-keyring && sudo apt-get --quiet update


sudo apt-get install libdvdcss2

- Step 4 Completed.

5. Install Ubuntu Tweak- Ubuntu tweak is an application that allow you to configure your Ubuntu with easier.
- Run the command below to download and install the Ubuntu tweak.

sudo add-apt-repository ppa:tualatrix/ppa
sudo apt-get update
sudo apt-get install ubuntu-tweak


fig 5.1


- Step 5 Completed.


6. Install Compiz Config System Manager (CCSM)- CCSM is a tools that get play around the desktop effects of Ubuntu system
- Run the command below to download and install the CCSM


sudo apt-get install compizconfig-settings-manager

fig 6.1

- Step 6 Completed.


7. Install Gnome Sushi
- Quickly preview file contents press space bar for previews file
- Run the command below to download and install the Gnome Sushi


sudo apt-get install gnome-sushi

- Step 7 Completed

Wednesday 2 May 2012

How to install Ubuntu 12.04 in Windows 7 with Virtual Machine (Not Dual Boot)

Hi guys,

Please follow the step below to lead you install the latest version Ubuntu 12.04 in your windows 7.
Note: this is not dual boot version.

Step 1: Preparation
a) Virtual Machine
- Click on the Softpedia Secure Download (US) 
- Auto download will trigger 

fig1.1
b) Ubuntu 
- Url to download the Ubuntu 12.04: http://www.ubuntu.com/download/desktop
fig 1.2
- Recommended 32bit.
- Click on Start Download


Step 2 : Install the Virtual Machine to your Machine 
fig.2.1

- You will find the VirtualBox-4.1.14-77440-Win.exe file (as shown as fig 2.1) downloaded to your machine.
- Double click on the file to start install the virtual machine 
fig 2.2


- Keep on clicking on next and finish the VM installation. 

Step 3: Create New Blank Virtual Machine
fig 3.1
Launch the Virtual Machine
Click on Start -> Oracle VM VirtualBox- > Oracle VM VirtualBox  (as shown as fig 3.1)

fig 3.2
- Click on "New"

fig 3.3

fig 3.4

- Type in the Ubuntu in the column Name 
- Operation System : Linux
- Version : Ubuntu


fig 3.5

- Arrange Memory for Ubuntu system  
- Adjust it to at least 1024mb or more to have better performance for Ubuntu system (by default is 512mb)


fig 3.6
- Arrange Hard Disk Space for Ubuntu system
- Select the "Create new Hard Disk" 


fig 3.7

Allocate it to 8GB, it can be more, but for me 8GB should be enough.


fig 3.8

fig 3.9

Summary of the system , then proceed to click on "Create"

Step 4 : Install the Ubuntu to the the Virtual Machine
fig 4.1
- You will see a Ubuntu Virtual Machine is on the list now.

fig 4.2
- Click on "Machine


fig 4.3
- Select "Settings...." 


fig 4.4

fig 4.5
- Select the "Display" -> tick on Enable 3D Acceleration 


fig 4.6
- Select the "Storage" -> then click on "Empty" under the IDE controller -> and click on the Mount icon as shown in fig 4.6


fig 4.7
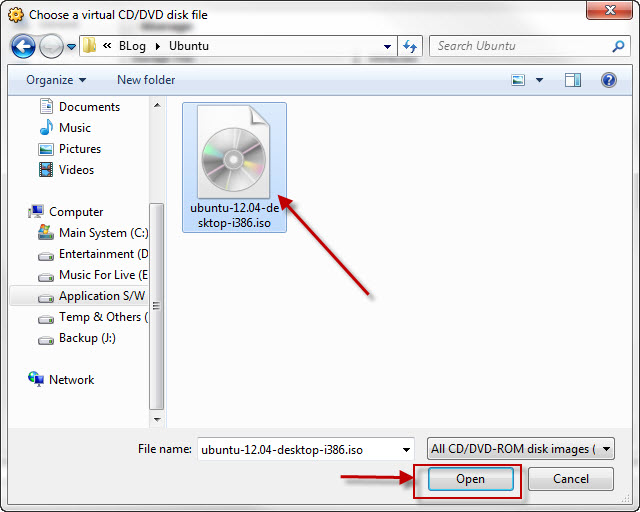
- Select the "Choose a virtual CD/DVD disk file....."


fig 4.8
- Locate the Ubuntu 12.04 iso file that you downloaded ealier then click "Open"


fig 4.9
- Now click "OK" to start the installation.


fig 4.10

- Select your Language then Click on the "Install Ubuntu"


fig 4.11

- Please be informed here, if you have a very good speed of internet connection, then you may tick on "Install this third-party software", else you may manually update it later, because it's really take time (around 10-20 mins). 

- this updates is for your machine can read the those audio and video format such like mp3, mpeg ...etc


fig 4.12
- Select the "Erase disk and install Ubuntu"
NO WORRY , it will not erase any data on your machine. It will only use the 8GB that you allocate earlier to install the Ubuntu


fig 4.13

- Click "Install Now"

fig 4.14

- Enter your "City Name" to the column


fig 4.15
 - Select your Keyboard Layout and Language then click "Continue"


fig 4.16
 - Fill in all the necessary information and click on "Continue"


fig 4.17
- Wait for the Ubuntu to be finish to install, meantime you can click on next to see what's new update for Ubuntu 12.04 as shown at fig 4.17
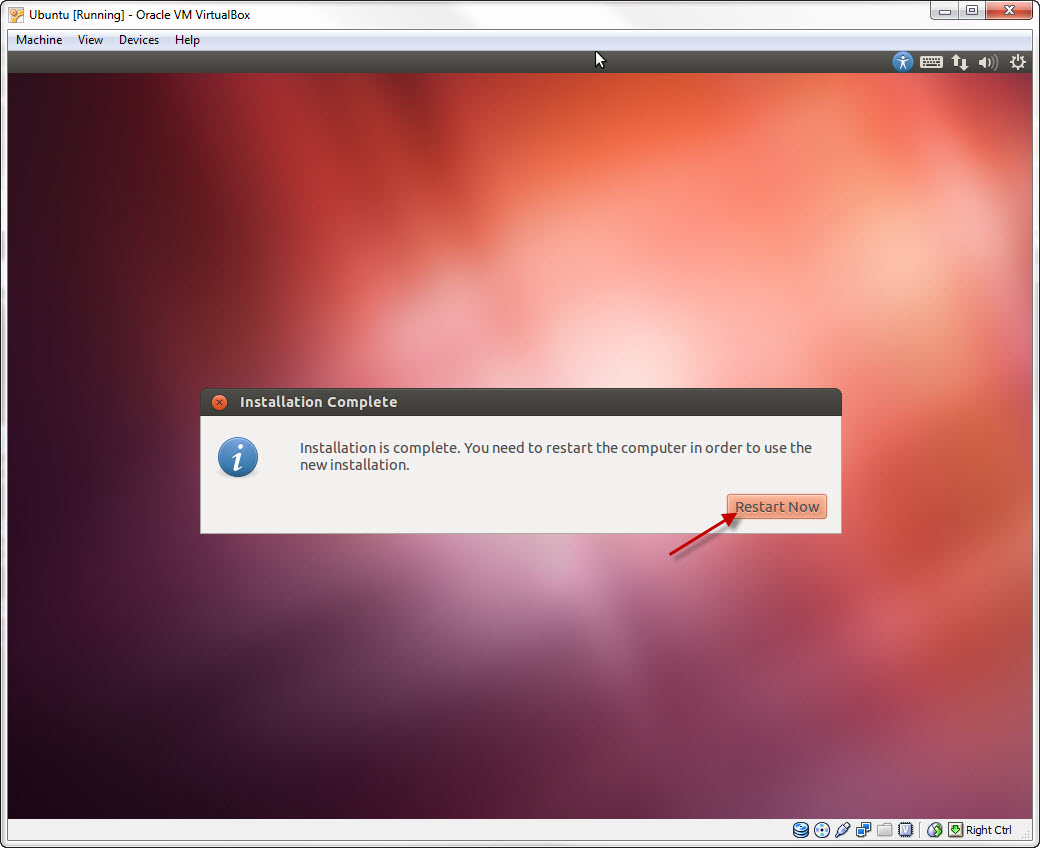


fig 4.18
- Click on "Restart Now" to complete the installation.
- Note: it will not restart your machine, but it's only restart the virtual machine.


fig 4.19
- Waiting for booting up.......
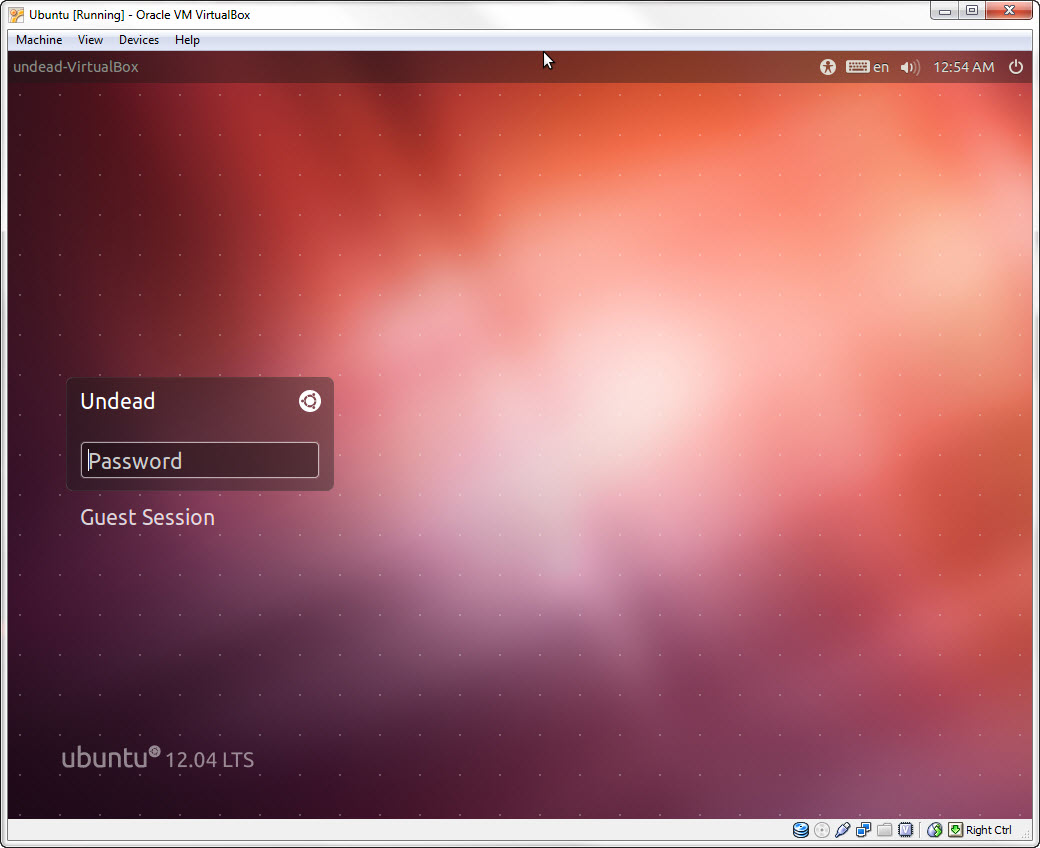

fig 4.20
- Enter your password to Login to the machine.


fig 4.21

CONGRATULATIONS!!!!!!!!!!  YOU HAVE COMPLETED SETUP UBUNTU SYSTEM IN YOUR WIN 7 !!!!!!!!!!!!!!!!!!!!!!!!!!!!!!!!!!